 Adam Bilsky
Updated :
Adam Bilsky
Updated :
Overview
This article introduces the School Settings section of the Admin side.
Foundry gives you an easy way to reflect your school environment by configuring some essential parameters, such as your school's terms, your scales, your global preferences and adding custom information fields. In this article, we briefly show how to access this functionality as an admin user.
Contents
The Admin role allows access to a number of Foundry's configuration settings for your school site.
Accessible from the Admin home page (shown below), the school settings can be configured in 4 separate sections:
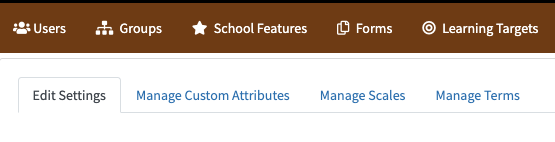
Edit Settings
Foundry enables you to manage your school 'look and feel' on the school setting page. General parameters are those items that affect the way Foundry looks and what is available to all teachers and students at your school. The following are available for you to customize your Foundry:
| School Name | The name of your school as it should appear on official documents, such as student transcripts you send to colleges. |
| Time Zone | The time zone in which your school operates. |
| Transfer Interview | Some schools use this for registering targets already earned elsewhere by transfer students. You can make your own form or import a pre-designed form, which uses target selectors to award existing credit. Read here for information on using this form. |
| Enable Project privacy | Use enhanced student privacy settings for experiences the student participates in by default. Note: these settings have been changed with the Foundry visibility update (read here for details). |
| Use PLP page to start? | Indicate if you like the student to always see their Personal Learning Plan (PLP) page first when signing on to Foundry. Otherwise, the Work to Do page will show by default. |
| Allow user defined PLP form to show? | If you have been given access to additional PLP page features (such as rearranging the PLP page content boxes), you can indicate here if you want your advisors to have access. |
| Select default student sort order | In the pages that have cohort and student name lists, indicate which sort order you prefer by default. |
| Allow students to start an experience? | Tell Foundry whether your students are allowed to develop an experience proposal and then submit to the advisor for approval, or whether the advisor must develop and assign the experience. |
| Drive user | The administrator for the Google mail / drive account for your school. |
| Standard Logo | The logo that you want to have shown on the screen and most other places of Foundry. Upload to register with Foundry. Shows here 'as is': the exact way in which it will appear. |
| Report Logo |
You can upload a separate logo for official documentation that you generate using Foundry, for instance transcripts. Note: The logo you update should be no larger than the dimensions specified on the page or they will not display correctly. |
Custom User Attributes
You are free to add any additional information fields you require as part of collecting and communicating information. Custom information fields can show in the following locations:
- On Summary transcripts
- On Detail transcripts
- On the student PLP page.
To add a new custom attribute, click "+ Create User Attribute" to view the following:
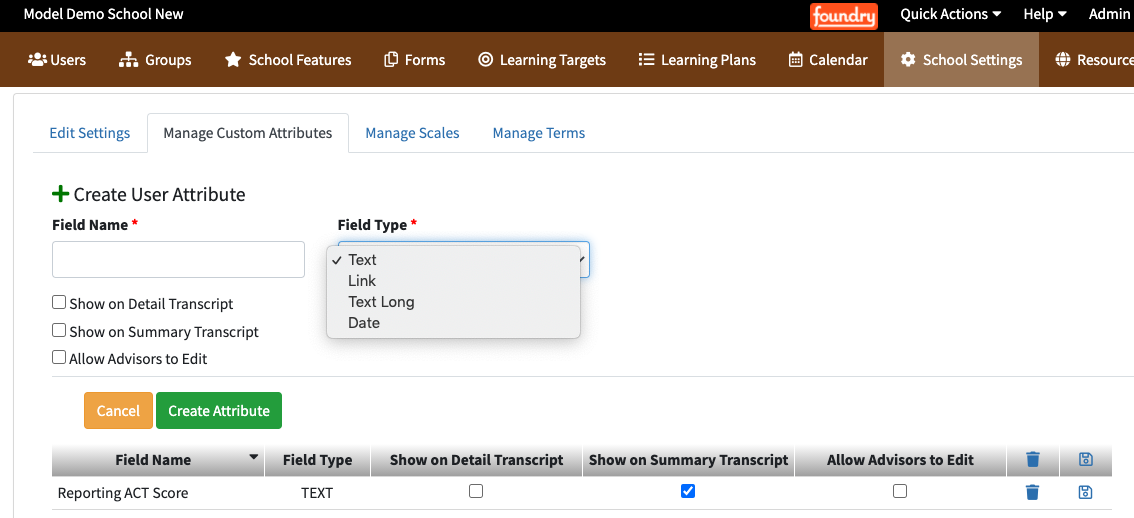
- Choose the field type (text, link, long text, or date);
- Name the attribute;
- Click "Create Attribute."
It will appear in the table below and you can edit as needed. Check "Allow Advisors to edit" box to allow advisors to input or change student attributes while logged into the Advisor role.
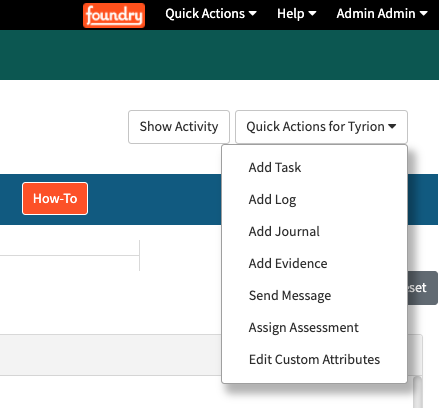
The ability to edit will appear when viewing the 'Quick actions for "(Student Name)' menu within student portal, as shown below:
Scales
Scales are how you will evaluate student work in Foundry - individual learning targets, entire learning experiences, skills, and grades are all managed here. You can use pre-loaded scales from Foundry or develop your own. For more in detail about developing and managing scales, read here.
Terms
Foundry uses Terms to distinguish which evaluated learning targets should be represented on transcripts, etc. Schools can have full control over the Terms they establish in Foundry. In fact, you can establish multiple Terms covering the same school year in parallel.
For instance, it is possible to establish both a full year term (12 months) as well as 3 or 4 consecutive terms, reflecting semesters, quarters, etc.
To establish a proper term, you only need to provide 3 items:
- Term name
- Term start date
- Term end date
As soon as a term has been configured in this window, it will be available for use in the Performance Page Trends view and in reports and transcripts.
Additional Reading
Click on these pages to learn more about what's available in the specific pages behind the menu items:
- Read more about managing Custom Attributes.
- Read more about configuring and managing Scales.
Comments