 Adam Bilsky
Updated :
Adam Bilsky
Updated :
| Note: This article contains video content that will not display or is not optimized to display correctly in the Foundry on-site support widget. For best results, we recommend reading the original in the Knowledge Base. Click the pop-out button |
Overview
This article covers experiences in more depth, including assignment options, experience workflow between advisors and students, further exploration of evaluation options, and a look at the Performance Page.
It is assumed you are familiar with the introductory experience article. If not, you can read it here before proceeding.
Contents
Overview Video
Create Your Second Experience
Repeat the same initial steps described in the article 'Create Your First Experience.' Next, read the section on Assignment Options. The initial steps are below:
Choose a Form
The form chooser opens as a pop-up. The chooser will display forms available to you in your user profile.
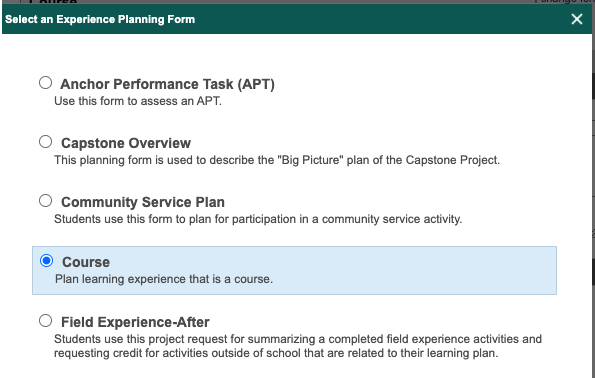
Note: The forms shown above are examples, and will likely differ from the forms on your site. If on your actual site you do not see options you are expecting, contact your school's Foundry administrator for assistance. If you are a Foundry admin, read here to learn about assigning forms.
Select the form type that best suits your learning experience. Since the video covers Student-Advisor workflow and shows elements like journals, logs, and evidence, you might choose an experience form with more options than the Mini-Plan shown in the video.
Create a title and description
Remember, this title will appear in many places throughout Foundry, so choose a name that is distinct enough from other experiences so you can find it in menus, yet concise enough to fit into displays and reports. You will be able to search by terms in the title and description in the search menu as well.
Required Fields (standard)
All Foundry experience forms have 4 required fields: title, description, experience members, and start/end date. Be sure to complete any other fields marked 'Required' on the form you selected.
Content and Skills Targets
For more interesting results, you might choose different targets from the first experience you created, so you can use more features on the Performance page.
You might try selecting an individual student's Learning Plan to see required targets in the chooser, or double-click to add all targets in a target group.
Add experience members
Type individual names in the text box, or select and add entire groups to the experience. As with targets, you can remove individuals by clicking the "remove" link beside their names. The advisor creating the experience is automatically added, so you do not need to add yourself.
| Note on visibility for advisors: Any advisor who is a member of group with a student listed on an experience will be able to see the experience when viewing her students. Only those advisors associated with the experience (they created or were added to it) or listed as managers of the experience will be able to edit the experience. For more on visibility, read here. |
Set start and end dates
As soon as an experience is assigned, members will see it as active in their Work-to-Do and Experiences pages.
The start date is what the date filter on the Experience page (and other locations in Foundry) uses to capture an experience.
The end date will display on the Experience page in the "due date" column. The date will change to yellow when the due date is near, and to red when the due date has passed.
Other form fields: Resources
If you are using a form that allows you to attach web or document resources (recommended), below is a short video (no audio) demonstrating how advisors and students will see those resources in the finished, assigned plan.
Assignment Options
Each experience can be assigned one of three ways: as an individual experience, a group (team) experience, or in a batch for students to adapt and request.
With both Option 1 and Option 2, you can either assign an experience so students can work on it and send it back to you for submission, or you can assign it and evaluate it immediately.
'Assign with Individual Evidence' (option 1) and 'Assign' (option 2) mean each member of the experience will work on and submit it individually, as with a traditional assignment. These options are ideal for asynchronous or individual work. The Overview video above demonstrates the workflow between Student and Advisor.
'Assign and Evaluate' (both options) means you will proceed directly to evaluation. This is shown in the introductory article. Uses for this option in practice might include small assignments completed in a live classroom setting, like an exit ticket, or an online quiz showing all student results at once.
Assignment Option 1: Individual student submissions
Option 1 assigns the same exact experience to all student members of the experience. The experiences are separate, so each student can submit individually. When Student 'A' has submitted the experience for evaluation but Student 'B' has not yet, Student 'B' will continue to see it as 'Active' on their Work to Do page.
As the below image shows, the advisor will see a split status tag on the experience plan when one or more - but not all - students have submitted it. Note the tag 'Individually Submitted' by the title.
Assignment Option 2: Team Experience
As with Option 1, all students receive the same experience plan. However, Option 2 is like a group project, so when one student submits the experience, it appears as Submitted for all students.
The image below shows the advisor viewing all students on a submitted experience. Note the tag 'Group Submitted' by the title.
Note: when students complete work on the experience - journals, logs, evidence uploads - these still appear individually for each student. So if Adelaide submits a journal for the experience, it is Adelaide's alone - it does not accrue as a group journal entry.
Assignment Option 3: Batch assigned experiences
Batch assignment is ideal for differentiating experiences among students with varying needs. It is also useful for allowing more student voice and choice - by creating a 'base' plan for students to modify and then submit to advisors for approval. You will create a base plan including the tasks and content and skills targets you expect all students to meet. Once assigned this way, they are in the 'Planned' status. You can see planned experiences using the status filter on your experiences page:
| Note: Every "Planned" experience will initially have the same name you designated. It is strongly encouraged that you develop a naming convention with this option. You should instruct students to add their name - to the front if the experience title is long - so you will be able to distinguish them in your workflow. If students do not edit the titles, you will have multiple experiences with the exact same name. The only way you will be able to tell them apart without opening them is to hover over each experience. See the image below. |
Students will see the new planned experience on their Work to Do and Experiences pages:
Each student now has the ability to modify the experience and submit it for you to review. Independently, or with your guidance, your students can add other targets they wish to demonstrate, as well as add tasks or other notes, goals, resources, etc. See the above note regarding the experience name. When they have finished editing it, the student will click "submit for review."
You will review, approve, and evaluate each experience individually, and each will persist separately in your workflow.
Next Steps: Manage Workflow and Evaluate the Experience
For managing workflow, you can use a sample student account to switch between advisor and student, or you can complete experience actions using the Student portal view.
To read more in detail about managing workflow on the Work to Do page, click here.
To read more in detail about managing workflow on the Experiences page, click here.
When you are ready to evaluate, click 'Submit for Evaluation' from either the student account or your advisor account. Read here for more detail on Experience Evaluation.
Suggested Reading:
| Note: Articles linked here under "Suggested Reading" are chosen by Foundry Support team members for their relevance and are updated as needed. The articles listed here may differ from those on the right side of the page, where the Knowledge Base AI lists "Related Articles." |
Labels: assignment, experience plans, learning experience,
Comments